the Blog
Hair and Makeup in Orlando

Wedding Day Tattoo Coverup
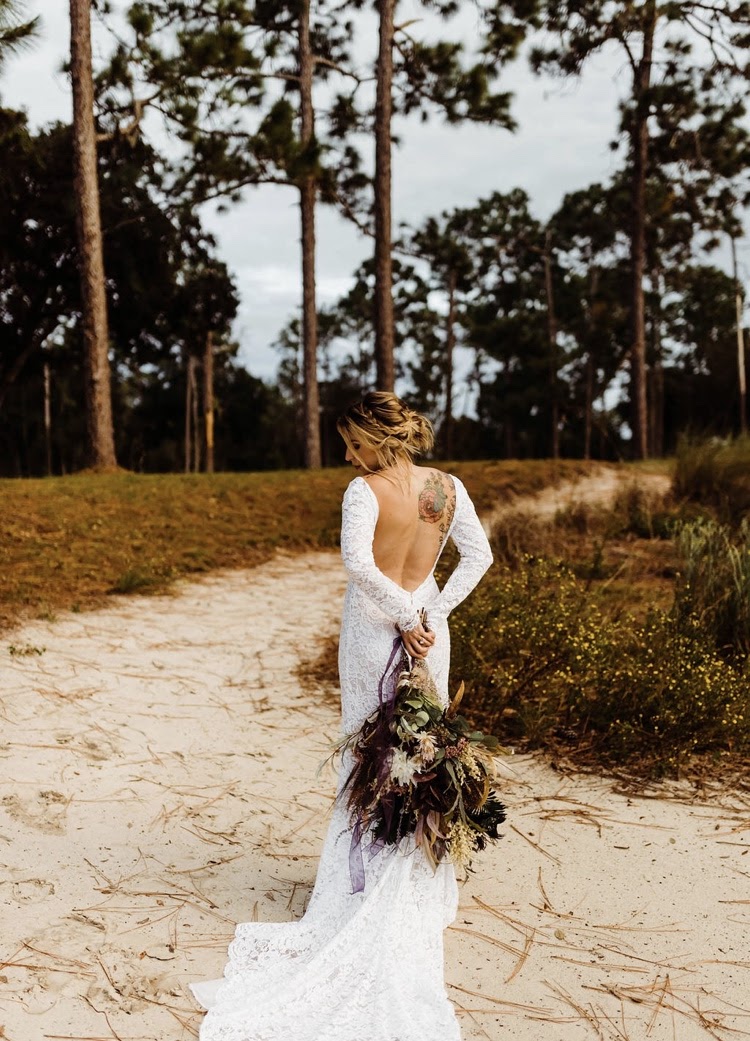
Featured Photo Credit: @Josiebrooksphotography
I know not everyone has tattoos, but to my brides that do, you know you all have that one tattoo that you thought was a GREAT idea at the time….turns out not so much. Now, you may be able to get away with covering it with your clothing on a daily basis, and that’s okay for everyday life. Fast forward a little and it’s time for your wedding day! You decided on that gorgeous backless wedding dress, and you look like a show stopper in it, except for that one little “problem”….The top of that really cute tramp stamp poking out of the dress and creeping up your lower back to say hey! AHH!
Don’t worry, the makeup pros are here to help you cover it up! Today I am going to share some tattoo coverage secrets with you, but shhh don’t tell anyone 😉 In all honesty, I would leave tattoo coverage to the pros, but if you think you got this, then go for it, babe!
Follow these steps below to cover that tatt!
STEP ONE: Make sure the area you are covering is clean and dry. Use a cotton pad and micellar cleansing water to ensure the area is clean and wait for it to dry. Unless you’ve recently showered, then skip this step. Then prep the skin as you would a normal face application. Use a light moisturizer and makeup primer.
STEP TWO: Use a color corrector to cover the tattoo. I was mostly trying to cover black lines in this tattoo which is why I chose the color orange. You will need to understand some color theory when trying to cover tattoos, which is why it’s best to leave to the pros!
Pro Tip: If you don’t have an orange color corrector, use an orange lipstick!
STEP THREE: Between each layer, set with a translucent colorless finishing powder and make sure it is completely dry before moving onto the next step. I used MAC Cosmetics Prep and Prime Transparent Finishing Powder
STEP FOUR: Use a shade lighter than your natural skin tone to brighten the area. I used Becca Cosmetics Skin Love Foundation. This is a medium coverage, buildable foundation, but you can also use a full coverage foundation as well! Use a beauty blender and tap the areas that need more coverage, and swipe to blend the edges out into the rest of your skin. Set with the finishing powder from step 3 and let dry completely.
STEP FIVE: Cover the area with a foundation that matches your skin tone. Again tapping the areas that need more coverage, and blending the edges out into your skin. Once you’ve achieved the desired look, set with the translucent powder, and let dry completely. Then set the area with a makeup setting spray. That’s it, babe! You’re tatt is covered and you’re ready to go!
If you give this a try be sure to tag us on Instagram: @beauty.brigade.bb
We want to see your work!
hey I’m Mandi!
Mandi has never been a full glam girly, so she especially understands the babes who want more of a natural to soft glam look! This is her specialty and she LOVES to give you those glowy, bronzey dewy vibes!
Trending
the Popular Posts
hey I’m Mandi!
Mandi has never been a full glam girly, so she especially understands the babes who want more of a natural to soft glam look! This is her specialty and she LOVES to give you those glowy, bronzey dewy vibes!
the ‘Gram
@beauty.brigade.bb
COPYRIGHT ©2024 BEAUTY BRIGADE,LLC - ALL RIGHTS RESERVED - BRAND & WEBSITE BY MOODEE STUDIO
Beauty Brigade is the premier team for Orlando wedding hair and makeup, providing on-site, high-end beauty services for brides and special events. Whether you’re saying “I do” in Orlando, Tampa, or anywhere in Central Florida, our expert artists specialize in flawless, long-lasting looks designed to enhance your natural beauty.


